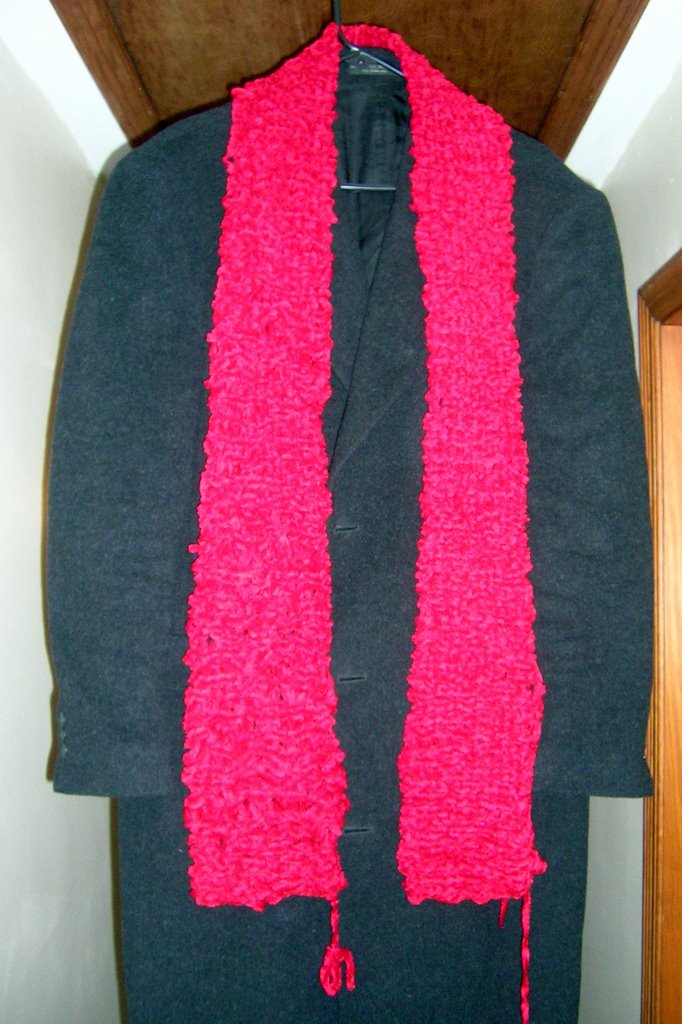
After Kristin performed a car trunk knit fix to untangle my attempt to join skeins, I was ready to put the last touches on my first project. The scarf was five feet long and looked like it could use one more foot in length. Not bad for a week’s work.
Kristin showed me how to bind off at my second knitting lesson. It didn’t seem hard, but binding off my practice piece nine days ago wasn’t enough to imprint it on my brain. Fresh off my misadventure in skein joining, I wanted to be careful not to make another mistake that would slow down my knitting. Kristin e-mailed a detailed explanation of binding off, and I sat in front of the computer following her instructions and methodically pulling the far stitch over the near stitch until I was done.
I can be my own worst critic, but the last thing I was going to do at this point was dwell on the errors in the first scarf I ever knitted. Sure, I could see that the first several rows of stitches were sloppier, which also meant the starting end was a little wider than the rest. It didn’t matter.
My prior experience doing anything remotely like this was making a God’s eye and latch hook rug in elementary school art class and taking the required seventh grade sewing class, which was part of a track with cooking, typing, and metal and wood shop. I’d been enjoying knitting, but that didn’t mean I was necessarily any good at it. I felt really good and took a little time to admire my first almost FO. (That’s the correct jargon, isn’t it? I’m picking up the abbreviations and slang as I go along.)
I use the qualifier because the ends have to be woven in. Kristin’s post on her blog about how much she hates finishing has me wondering what it must be like. For now I’ll knit scarves until I have enough that I can finish all of them in one fell swoop. Perhaps a finishing party will be in order?
Binding off had gone well. Now I was faced with casting on. Kristin had taken care of this at my first knitting lesson and taught me at the second one, but as was true for binding off, not doing it for several days isn’t the best way to make it stick. Again, I had her written instructions and links to some websites to guide me. And you know what? It made sense once I started! I cast on thirteen stitches of the super bulky bright blue acrylic onto my turquoise US 15 needle and was ready to begin my second project.
In an earlier post I claimed this was bulky weight yarn. Kristin was convinced it was super bulky. The wrapper didn’t specify, at least in terms that meant anything to me. (Give me a picture of a skein with a number on it.) A check of the Patons Yarn website proved that Kristin was correct. The woman knows her yarn.
This yarn’s feel was a little different and presented some challenges that the chenille hadn’t. I could wrap it more tightly around the needles, which was all well and good unless I put the right needle into the stitch below where it should go. It’s a sign of my progress that I was able to catch this before I knitted a catastrophe. The tightness—or let’s call it coziness, in keeping with the yarn’s friendlier name—had me concerned. I’d finish a stitch and give it a light tug, which made the yarn cozy up. Then the light bulb went on over my head. I want the stitches to be cozier, so I was doing the right thing.
I also developed a technique that made it simpler and faster for me to wrap the yarn. Kristin wraps with her right hand, but my attempt to imitate her wasn’t working. I’m right handed, so I'm not sure why. I found that if I keep the skein on my left, drape the yarn over my left wrist, and hold it between my left index finger and thumb, I have better control of everything. (There’s probably a proper knitting term for this.) I would still like to learn how to wrap with my right hand, but this will be sufficient for now.
I knitted a few inches of my second scarf before setting it down for the night. It was a really good night considering I had a rough day at work. I did some basic beginner’s techniques that I wasn’t sure I knew how to do, and I finished knitting my first project. I was proud of myself, and I couldn’t wait to tell Kristin about my progress and show her the results.
Are you dying from suspense yet? Of course I have to post a couple pictures. The scarlet doesn't look saturated enough in the photo, but this will give you an idea how it looks until I can get a better shot.
 Here's a close-up of the stitches.
 The stitches on the right side are where I started. It's pretty apparent that my knitting is better on the left side.
Next…a trip to local yarn stores.
 Here's a close-up of the stitches.
 The stitches on the right side are where I started. It's pretty apparent that my knitting is better on the left side.


3 Comments:
Congratulations, it looks really lovely. A great first effort.
Thanks. If the first one turned out this well, then I'm excited to see what I can do with more experience.
Scarf #1 looks great! Your stitches have really evened out. Your brother will be so very impressed.
Can't wait to see finished scarf #2!
Post a Comment
<< Home